Hexo NexT 部署
本地安装 Hexo,提交代码至 Github,触发 Github Action 生成静态文件 同步至服务器
Hexo 本地部署
根据 Hexo 文档 Hexo 需要 Node.js 和 git
环境
Mac 上在终端中使用命令
brew install git安装 Git,使用git -v查看版本使用
brew install node安装 node.js (npm 会同步安装),可以使用node -v和npm -v查看版本,根据版本文档node 14.0.0以上即可。
- 使用
npm install -g hexo-cli安装 Hexo,注意可以使用不同的源npm install -g hexo-cli --registry https://registry.npm.taobao.org
初始化 Hexo 项目
在合适的文件夹下,初始化 Hexo 项目
- 使用
hexo init <项目名>初始化 Hexo
1 | ➜ hexoInit hexo init MyBlog |
- 使用
cd <项目名>进入生成的文件夹,ls用来查看项目结构
1 | → hexoInit cd MyBlog |
- 这个时候可以使用
npm install安装项目所需依赖 - 然后可以使用
hexo s启动网站了。注意:如果出现端口被占用,可以使用lsof -i:4000查询占用端口的程序,然后使用sudo kill -9 <PID>结束该程序,或者使用hexo s -p <port>指定其他端口运行服务
1 | → MyBLog hexo s |
安装 NexT 主题
目前 NexT 的版本为8.19.0 根据 官方文档 可以使用npm install hexo-theme-next或者git clone https://github.com/next-theme/hexo-theme-next themes/next 安装主题,这里推荐使用npm install hexo-theme-next的方式安装,方便后续的代码提交和自动部署。
1 | → MyBlog npm install hexo-theme-next |
安装后,会发现在themes文件夹下没有 next 主题,而是出现在了node_modules 文件夹下面。
为了使安装的主题应用到 Hexo 上,请修改项目根目录下的_config.yml文件,将theme: landscape 修改为 theme: next
现在即可使用 hexo s启动网站了。
配置主题
在安装完主题后,可以根据官方文档进行个性化配置了:Hexo 和 NexT Theme Settings。
注意点:
- 对于 Hexo5.0 以上版本官方建议使用备用主题配置:
- 将 next 主题的配置文件从
MyBlog/node_modules/hexo-theme-next中复制出来并重命名为_config.next.yml即和 Hexo 默认主题landscape类似,如使用cp node_modules/hexo-theme-next/_config.yml _config.next.yml。 - 如使用
git clone https://github.com/next-theme/hexo-theme-next themes/next安装主题,将配置文件从MyBlog/themes/next中复制出来,如使用命令cp themes/next/_config.yml _config.next.yml
- 将 next 主题的配置文件从
_config.yml中关于语言的设置,请务必添加国家代码,否则可能出现乱码:language: zh-CN
Github 代码提交
创建Github 仓库 建议设定为私有的,仓库名随自己喜欢
本地配置 deplay key,可以参考 Github 文档
- 生成SSH Key 参考
ssh-keygen -t ed25519 -C "your_email@example.com"
- 生成SSH Key 参考
1 | → ssh ssh-keygen -t ed25519 -C "XXXX@XXX.XXX" |
- 生成的密钥为 id_ed25519_test,使用
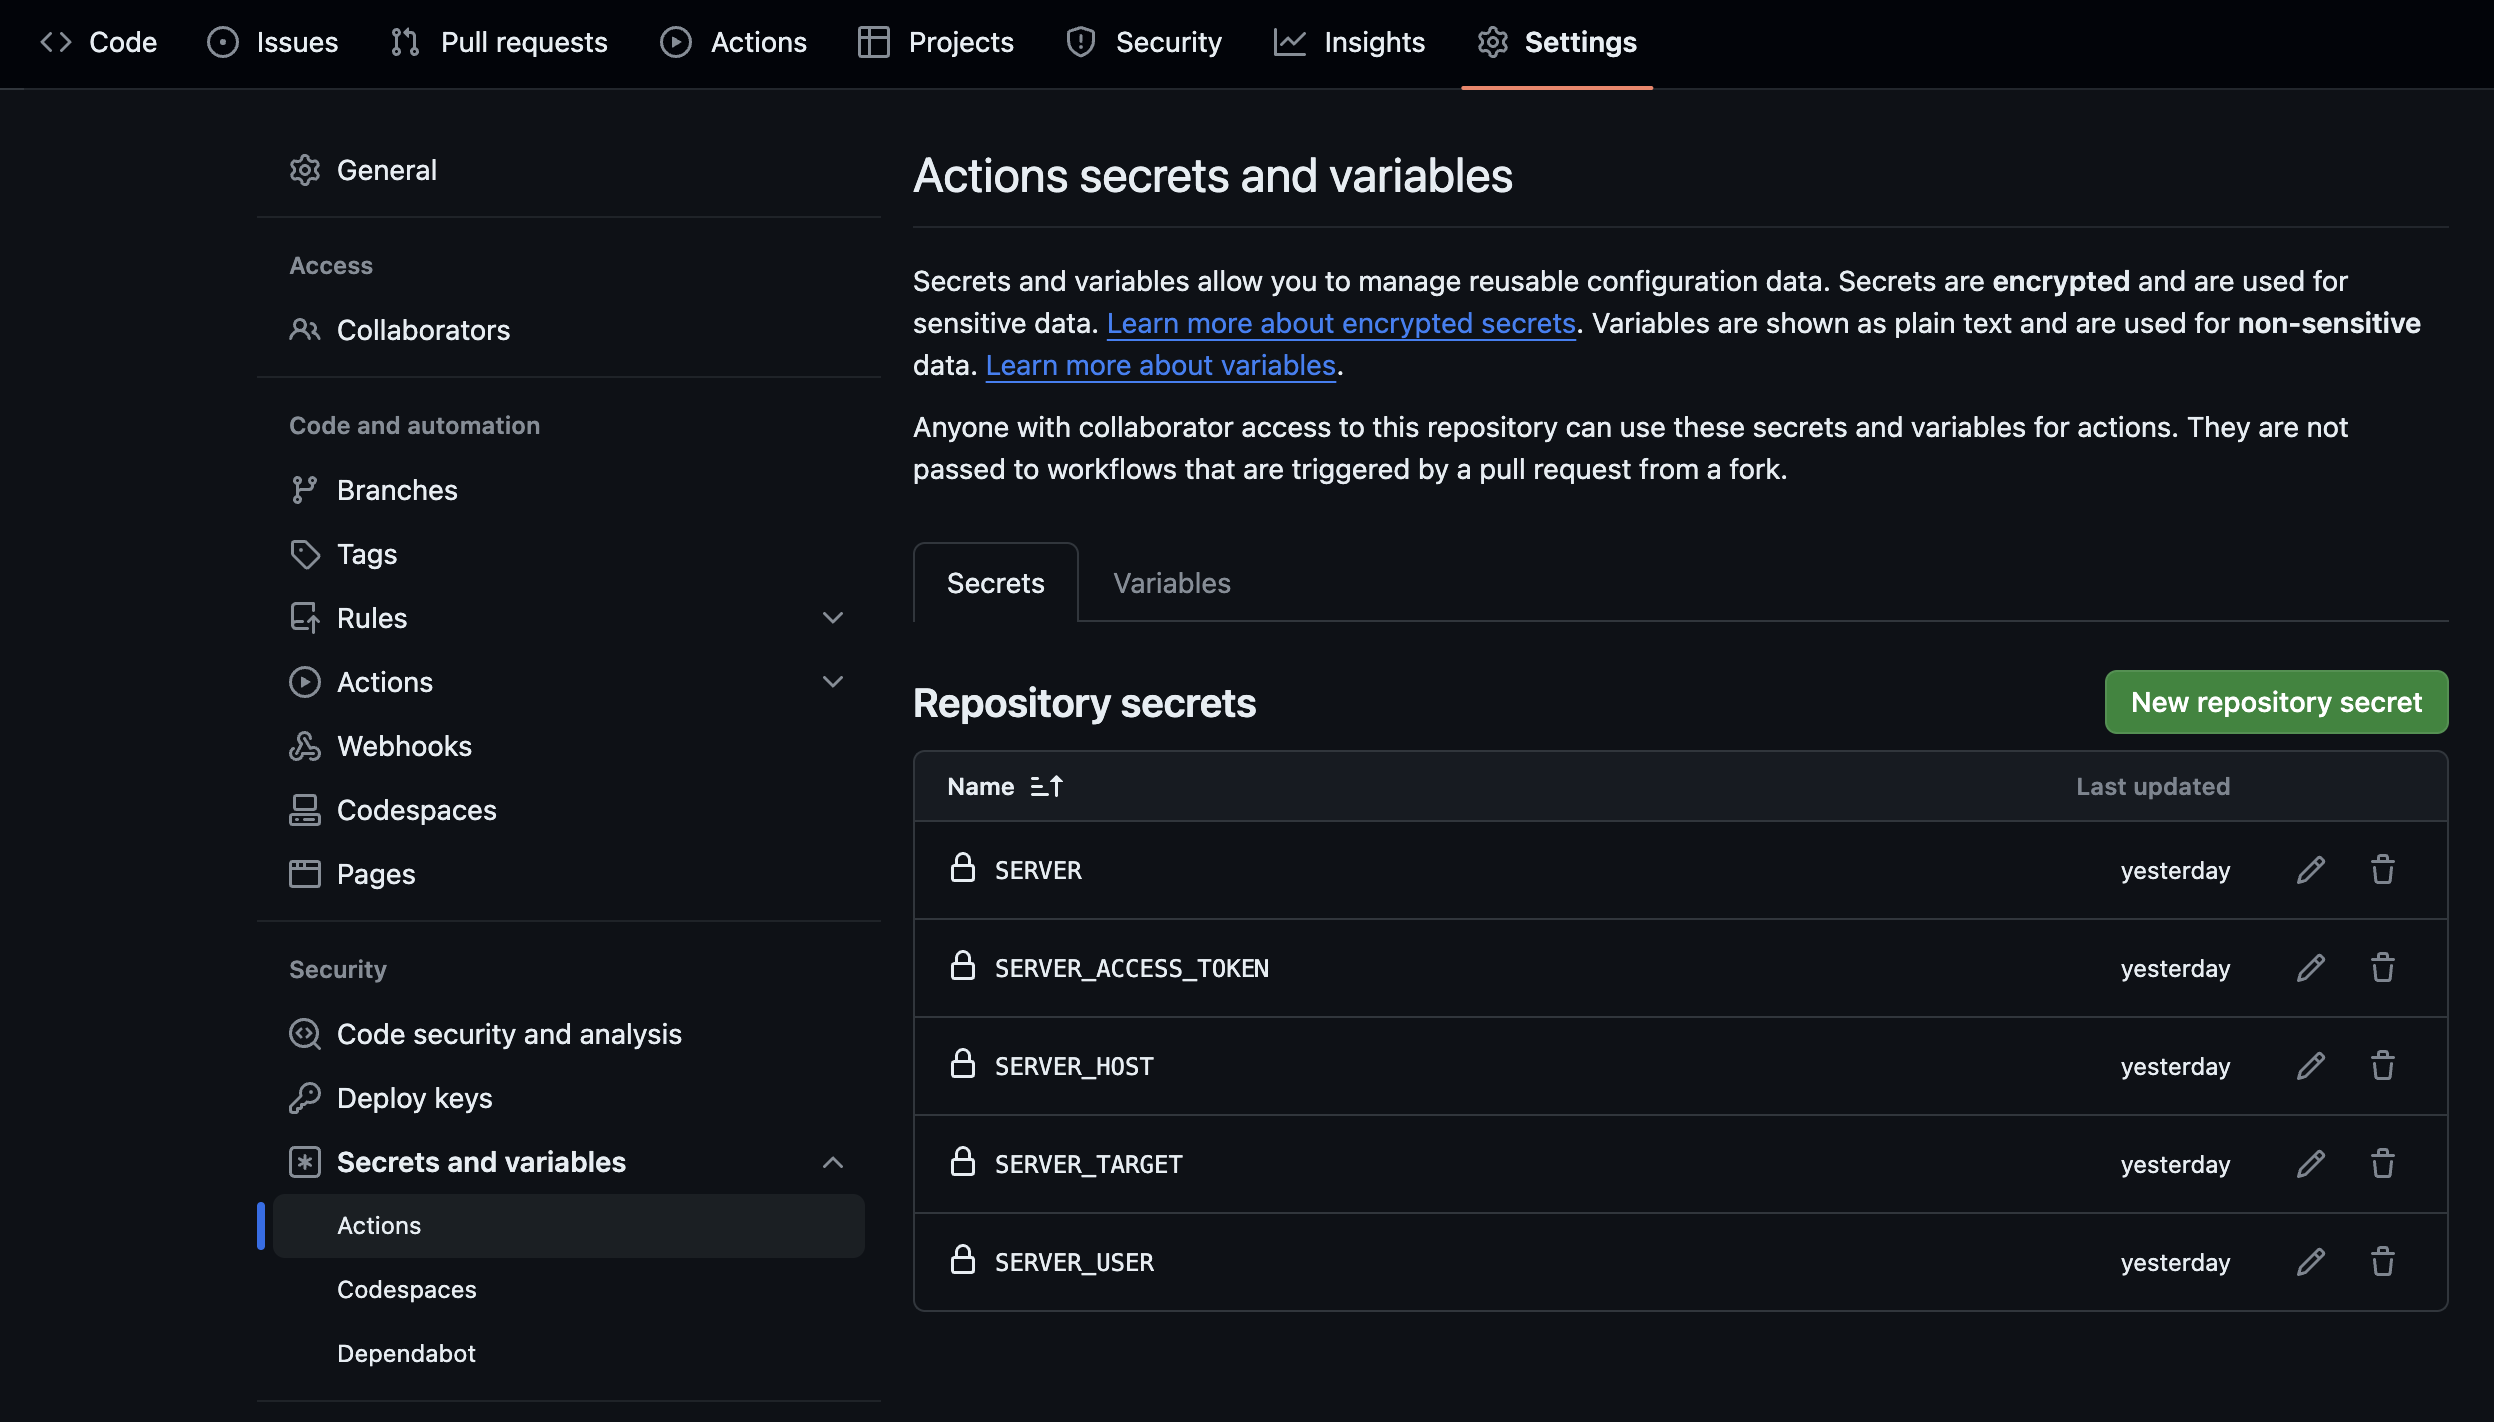
cat id_ed25519_test.pub查看公钥 - 将公钥添加到仓库中,Settings –> Security –> Deploy keys –> Add new 将公钥复制进去,注意勾选 Allow write access
- 由于本地可能存在多个密钥,请使用
ssh config配置ssh-agent。1
2
3
4
5➜ .ssh vim config
1 Host test
2 HostName github.com
3 User git
4 IdentityFile ~/.ssh/id_ed25519_test - 将SSH 私钥添加到 ssh-agent,并将密码存储在钥匙串中
1
2➜ .ssh ssh-add --apple-use-keychain ~/.ssh/id_ed25519_test
Identity added: /Users/shenhongge/.ssh/id_ed25519_test (XXXX@XXX.XXX) - 使用
ssh -T test测试1
2➜ .ssh ssh -T test
Hi Accelerator586/Test! You've successfully authenticated, but GitHub does not provide shell access. - 本地 Git 项目配置
- 进入项目根目录
cd MyBlog - 将 Hexo 的
.github删除1
2
3
4
5
6
7
8
9
10
11
12
13
14
15
16
17
18
19
20
21
22
23
24
25
26
27
28
29➜ MyBlog la
total 312
drwxr-xr-x@ 3 shenhongge staff 96B Jan 25 15:57 .github
-rw-r--r--@ 1 shenhongge staff 82B Jan 25 15:57 .gitignore
-rw-r--r--@ 1 shenhongge staff 0B Jan 25 15:57 _config.landscape.yml
-rw-r--r--@ 1 shenhongge staff 29K Jan 25 16:40 _config.next.yml
-rw-r--r--@ 1 shenhongge staff 2.4K Jan 25 15:57 _config.yml
-rw-r--r--@ 1 shenhongge staff 20K Jan 25 16:11 db.json
drwxr-xr-x@ 214 shenhongge staff 6.7K Jan 25 16:29 node_modules
-rw-r--r--@ 1 shenhongge staff 92K Jan 25 16:29 package-lock.json
-rw-r--r--@ 1 shenhongge staff 654B Jan 25 16:29 package.json
drwxr-xr-x@ 5 shenhongge staff 160B Jan 25 15:57 scaffolds
drwxr-xr-x@ 3 shenhongge staff 96B Jan 25 15:57 source
drwxr-xr-x@ 3 shenhongge staff 96B Jan 25 15:57 themes
➜ MyBlog rm -rf .github
➜ MyBlog la
total 312
-rw-r--r--@ 1 shenhongge staff 82B Jan 25 15:57 .gitignore
-rw-r--r--@ 1 shenhongge staff 0B Jan 25 15:57 _config.landscape.yml
-rw-r--r--@ 1 shenhongge staff 29K Jan 25 16:40 _config.next.yml
-rw-r--r--@ 1 shenhongge staff 2.4K Jan 25 15:57 _config.yml
-rw-r--r--@ 1 shenhongge staff 20K Jan 25 16:11 db.json
drwxr-xr-x@ 214 shenhongge staff 6.7K Jan 25 16:29 node_modules
-rw-r--r--@ 1 shenhongge staff 92K Jan 25 16:29 package-lock.json
-rw-r--r--@ 1 shenhongge staff 654B Jan 25 16:29 package.json
drwxr-xr-x@ 5 shenhongge staff 160B Jan 25 15:57 scaffolds
drwxr-xr-x@ 3 shenhongge staff 96B Jan 25 15:57 source
drwxr-xr-x@ 3 shenhongge staff 96B Jan 25 15:57 themes
➜ MyBlog - 使用
git init初始化 Git 项目 - 配置当前项目 git 用户名和邮箱
- 指定远程路径
- 拉取远端仓库
- 将项目代码添加到 git 项目中
- 添加 commit
- 提交本地分支到仓库 main 分支
1
2
3
4
5
6
7
8
9
10
11
12
13
14
15
16
17
18
19
20
21
22
23➜ MyBlog git init
Initialized empty Git repository in hexoInit/MyBlog/.git/
➜ MyBlog git:(main) git config user.email "geshenhon@gmail.com"
➜ MyBlog git:(main) git config user.name "geshenhong"
➜ MyBlog git:(main) ✗ git remote add origin git@test:Accelerator586/Test.git
➜ MyBlog git:(main) ✗ git pull
There is no tracking information for the current branch.
Please specify which branch you want to merge with.
See git-pull(1) for details.
git pull <remote> <branch>
If you wish to set tracking information for this branch you can do so with:
git branch --set-upstream-to=origin/<branch> main
➜ MyBlog git:(main) git commit -m "hexo init"
On branch main
➜ MyBlog git:(main) git push origin main
Enumerating objects: 16, done.
Counting objects: 100% (16/16), done.
Delta compression using up to 11 threads
Compressing objects: 100% (10/10), done.
Writing objects: 100% (16/16), 37.20 KiB | 12.40 MiB/s, done.
Total 16 (delta 0), reused 0 (delta 0), pack-reused 0
To test:Accelerator586/Test.git
* [new branch] main -> main
- 进入项目根目录
- 此时,可以在 github 上看到已提交的代码。
服务器配置
配置SSH
同本地SSH配置,主要是创建可以让 Github Action 登录的SSH key
已ubuntu22.04 为例
- 修改ssh配置文件,运行 root用户远程登入
1 | ubuntu@VM-16-9-ubuntu:~$ vim /etc/ssh/sshd_config |
- 重启ssh服务,使修改生效
1 | ubuntu@VM-16-9-ubuntu:~$ sudo systemctl restart ssh |
配置Nginx
这里使用 Nginx 作为网站的服务器
- 安装Nginx
1
2sudo apt update
sudo apt install nginx - 配置代理:在
root后面添加 网站页面路径1
2
3
4
5
6
7
8
9
10
11
12
13
14
15
16
17
18
19
20ubuntu@VM-16-9-ubuntu:~$ cd /etc/nginx/sites-enabled/
ubuntu@VM-16-9-ubuntu:/etc/nginx/sites-enabled$ sudo cp default test.conf
ubuntu@VM-16-9-ubuntu:/etc/nginx/sites-enabled$ sudo vim test.conf
server {
listen 80 default_server;
listen [::]:80 default_server;
server_tokens off;
root /var/www/test;
# Add index.php to the list if you are using PHP
index index.html index.htm index.nginx-debian.html;
server_name XXX.XXX;
location / {
# First attempt to serve request as file, then
# as directory, then fall back to displaying a 404.
try_files $uri $uri/ =404;
}
} - 重启Nginx服务
1
ubuntu@VM-16-9-ubuntu:/etc/nginx/sites-enabled$ sudo nginx -s reload
Github Action
- 在本地项目根目录新建文件夹
.github和.github/workflows1
2➜ MyBlog git:(main) mkdir .github
➜ MyBlog git:(main) mkdir .github/workflows - 然后在
.github/workflows下创建main.yml1
2➜ MyBlog git:(main) cd .github/workflows
➜ workflows git:(main) vim main.yml - 粘贴脚本,这里参考了 枫叶的博客
1 | name: Deploy Hexo and Publish to Remote Host |
在 github上对 Action 进行配置
使用 git 命令提交代码
1
2
3
4
5
6
7
8
9
10
11
12
13
14
15
16➜ workflows git:(main) ✗ git add .
➜ workflows git:(main) ✗ git commit -m "init action"
[main 17fd810] init action
1 file changed, 46 insertions(+)
create mode 100644 .github/workflows/main.yml
➜ workflows git:(main) git push origin main
Enumerating objects: 6, done.
Counting objects: 100% (6/6), done.
Delta compression using up to 11 threads
Compressing objects: 100% (3/3), done.
Writing objects: 100% (5/5), 1.21 KiB | 1.21 MiB/s, done.
Total 5 (delta 1), reused 0 (delta 0), pack-reused 0
remote: Resolving deltas: 100% (1/1), completed with 1 local object.
To test:Accelerator586/Test.git
3459595..17fd810 main -> main
➜ workflows git:(main)注意,这次提交自动运行 Action。